Getting started guide
TimeCamp Planner is a task management software with communication and collaboration features. You can plan resources, make timelines, manage teams and tasks, and track progress in one tool.
This guide will walk you through everything you need to know about using TimeCamp Planner, from setting up your first project to equipping your team with all of the tools they need to get the job done.
Detailed instructions and advanced capabilities are covered in separate articles. Links to them can be found in the guide below but you can also use the article search box at the top of this page to find descriptions of the features you are interested in.
Let's start managing your tasks!
Before you start
TimeCamp Planner is a SaaS software that allows you to manage tasks and communicate with team at one place. We offer 3 versions of the TimeCamp Planner app:
- web application - https://planner.timecamp.com/ is a full version of Planner that supports all available features;
- desktop application - works in the same way as web version. You can download it here: https://www.timecamp.com/planner#applications;
- mobile application - contains limited features, but allows for collaborating and managing tasks. You can download it from the App Store and Google Play;
Check the detailed instructions explaining how to navigate within the system.
What is a Workspace?
A Workspace is a place where all information is stored. Within a workspace, you can communicate with your colleagues, create projects, customize boards, and schedule your work.
Workspace is the first level of your account structure. Each workspace contains its own list of projects and added members. In addition, each workspace requires a separate subscription.
We don't provide an option to transfer data between workspaces.
What is a Project?
Projects help to organize your work and communicate with other project members. You can work on lists and tasks within different projects and have an overview of your schedule.
TimeCamp Planner allows to create an unlimited number of projects within the workspace.
Each project contains its own team and chat section as well as a list of tasks to complete. Lists and tasks can be easily moved between projects.
We provide an option to create public and private projects.
Invite your team
Every user in TimeCamp Planner has permission to invite new team members. You can invite new users and set their roles in Workspace Settings or invite new users directly within the Project view.
Let's start with managing team in the Workspace Settings.

Input a user's email address and click on the Send invitation button. You can input a few different email addresses to invite multiple users at once.

Here you'll find the description of all available methods for inviting users.
We provide 3 different system roles that may help to organize the team's structure and define users' permissions:
- Administrator
- User
- Guest
Administrator of the account can access workspace settings and manage the subscription. In addition, Administrators can change members' system roles, set their job titles, and disable or reactivate team members.
User can join all public projects within the workspace and create their own public and private projects. They can start a chat with any of the team members added to the workspace. In addition, users can create integrations, enable project add-ons and invite new team members.
Guest is a special role that allows you to collaborate with someone only on a specific project and not grant access to the rest of your projects and team members. Learn more

Apart from account roles, you can also define job titles. It can be used to define departments, roles in organization, workplace, etc.
The assigned job title will be visible next to the user's name in the Chat section and will be available in filters in the Planner view.

Only the Administrator of account can set and edit account roles or job titles.
Board basics
This is a quick overview of the things you need to know when you are just getting started with managing your tasks and schedule in TimeCamp Planner.

What is a board?
Board represents a place to keep track of information. Here you can organize your tasks, monitor deadlines and collaborate with other team members.
What is a list?
List represents a place where you add cards and organize their stages of progress, priorities, value, etc. Lists can be used to create a workflow where cards are moved across each step in the process from start to finish, or simply act as a place to keep track of ideas and information. There’s no limit to the number of lists you can add to a board, and they can be arranged and titled however you’d like.
What is a Card?
Card is the last level of a board and is the most detailed unit. Cards are used to represent tasks and ideas. You can define timeframes for a card or set the estimated time for the card to be finished. In addition, you can add a checklist to each card, assign team members and comment on tasks you're working on.
Cards can be customized and moved across lists to show progress. There’s no limit to the number of cards you can add to a board.
Create project
Projects allow to conveniently manage a lot of information, track task statuses, and collaborate with team members at every phase of the project. With TimeCamp Planner you can monitor each step of work progress and keep an ey o task's due date.
Let's start with creating your first project.
Add project
To create a new project click on the "plus" icon next to the Projects section. Fill in project details and decide whether it should be a public or private type of project.

All public projects created within the workspace will be accessible in the search box. If you would like to view and join the available project click on the search bar and scroll the list or enter a project name.

We recommend checking this article to learn more about all the available options and settings for projects.
Add project members
When a project is created you can proceed with inviting other team members to work and collaborate on tasks.
To invite other members click on the "team" icon on the top menu and click on the Add members button. Here you also can check the list of all users who joined a project.

After adding other users to projects you can communicate with them in the Chat tab or leave comments directly in the task's view. TimeCamp Planner also contains an option to start a video meeting with project members.
We recommend checking this article to learn more about Project Chat.
Customize board
The next step is to add tasks you'll be working on under this project.
In the Board tab, you can easily manage all lists and tags. Start with creating lists.

After lists are added create tasks within lists. You can move tasks between lists at anytime

Check the Boards category to learn more about all available list and task functionalities.
Project Views
Each project contains three tabs with views that present different layouts of your scheduled work:
- List - presents a full list and allows to conveniently manage all tasks created within the project;
- Timeline - contains more various options for presenting data and allows to choose between six time periods;
- Calendar - a very useful view if you'd like to check the tasks scheduled throughout the month or week;

Addons
Addons are special functionalities you can add to projects in order to facilitate, estimate and organize your work with tasks.
We provide four project addons. You can turn on each of them by clicking on the "puzzle" icon in the upper-right corner of a project view.

Let's walk through all of them!
Points - estimate the time you should spend on each task. It could be very useful for organizing your workday. Learn more
Votes - gather opinions or reactions on a specific task. Once the Voted Add-on is enabled, team members can vote on a card using emojis. Learn more
Recurring tasks - You can make a task recurring on a custom basis. Tasks will be automatically copied with their Title, Description, Tags, and Checklists. Learn more
Work in progress limit - you can set the limit of cards listed on a board. This feature allows you to control the workload and finish the already started tasks before taking on the next ones. Learn more
Integrate with other apps
If you use other software such as Trello, Gmail, Calendar, etc., you can easily connect them with your TimeCamp Planner account. Integrations will allow you to store all the tasks and boards you need in one place.
Thanks to integrations you can not only import or export your tasks but also enable the time tracking feature. integration with TimeCamp will allow you to keep a record of time you spent on each task and generate detailed reports based on tracked time.
To check the available integrations and enable one of them, click on your name on the left side menu and choose the Integrations option. You'll be redirected to the Addons view.

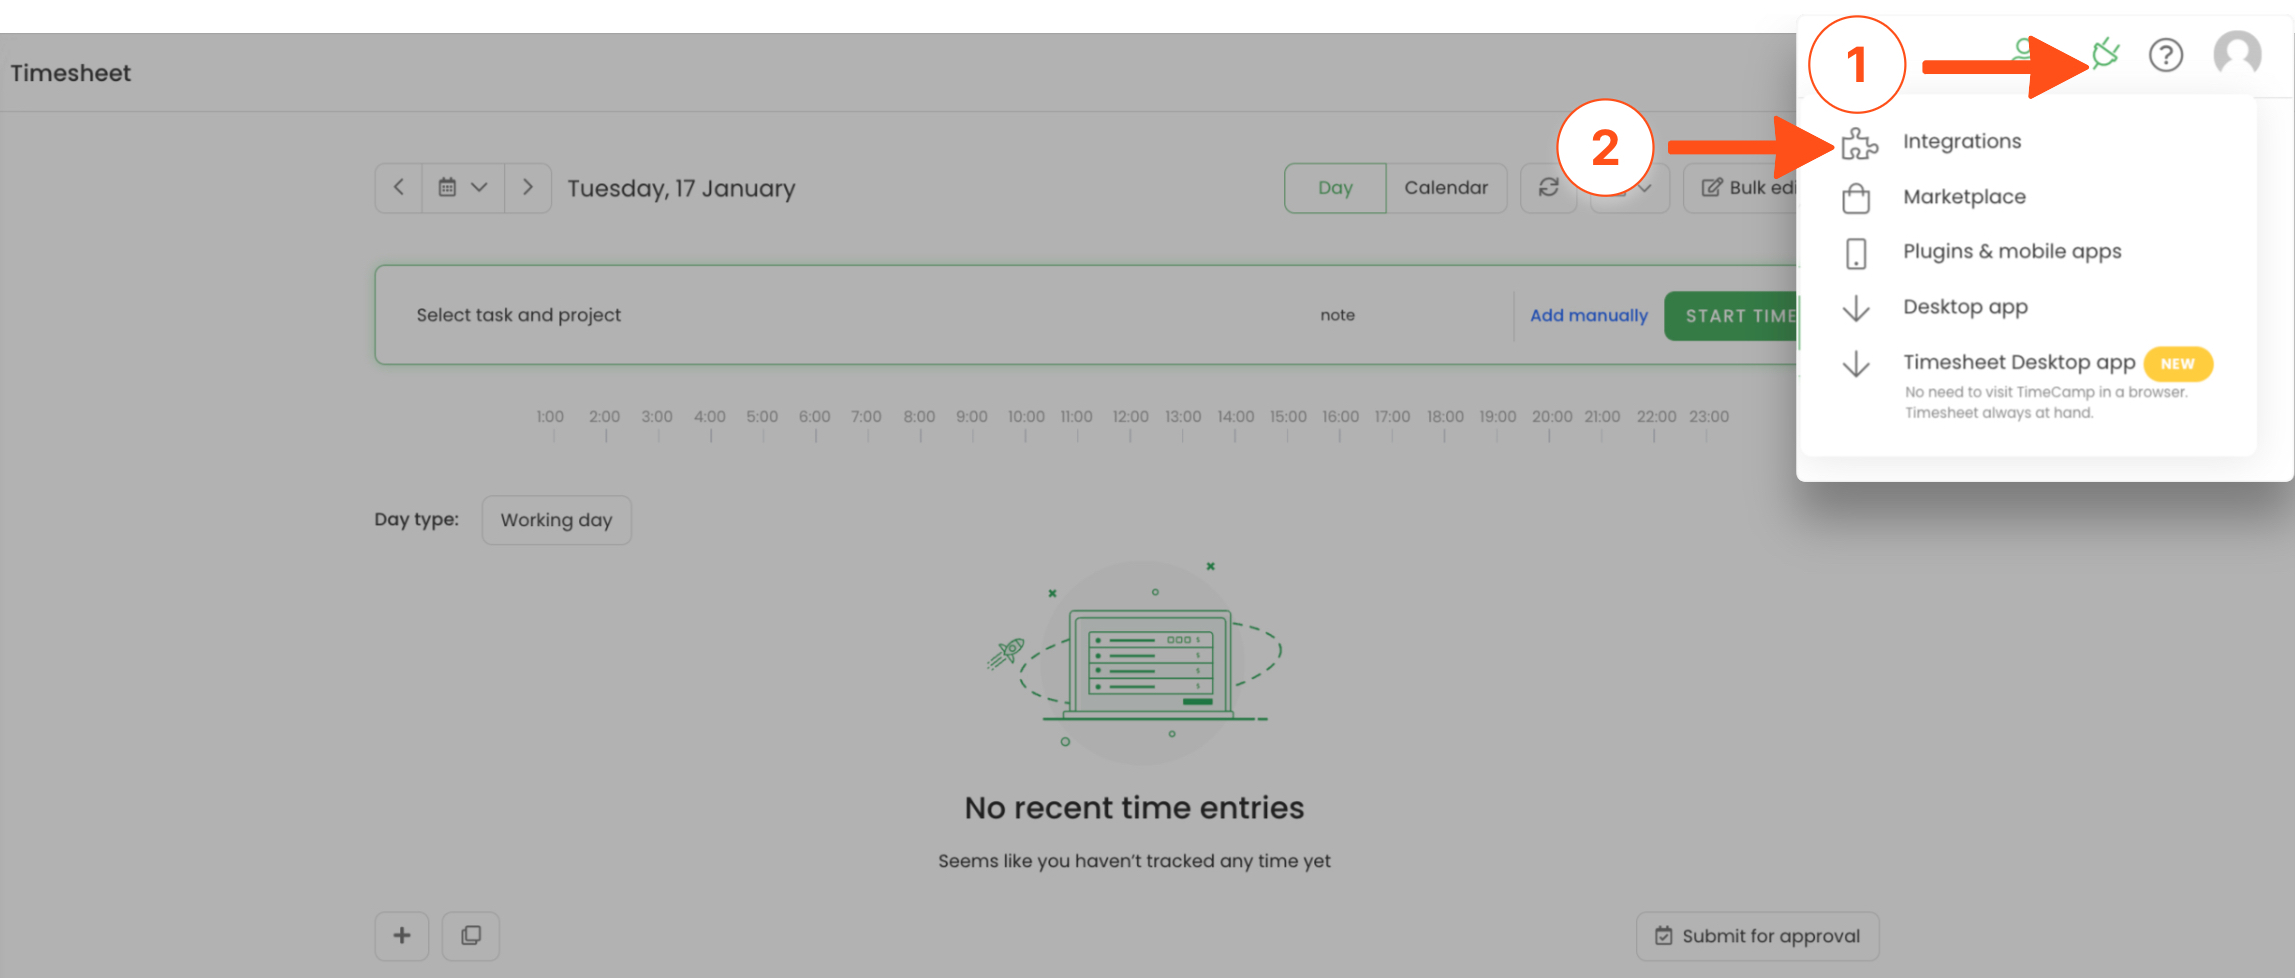
To find detailed instructions on enabling a specific integration visit the Integrations category.